iOS
Integrating ezto verify's SDK into your React Native project for iOS is straightforward. Follow our comprehensive documentation and sample code snippets to quickly implement user verification features.
1 Requirements
The minimum requirements needed in order to use the ezto verify SDK in your Flutter project. Ensure your development environment meets these prerequisites before proceeding with the integration.
- iOS 13 and above
2 Installation
- To add the ezto verify SDK to your React Native project, intiate the code
io.ezto.verify.reactusing the npm command.
npm i io.ezto.verify.react
Navigate to the iOS folder using
cd iosand runpod install.Open
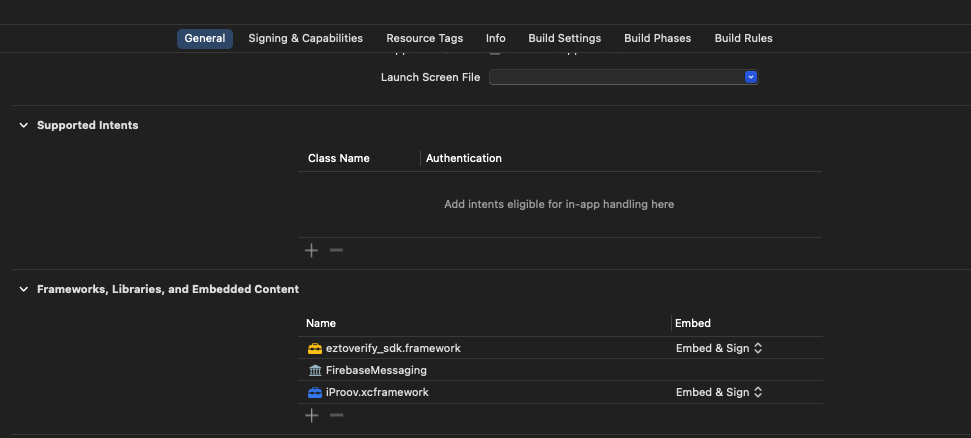
.xcworkspacein Xcode.Go to Build Phases > Link Binary With Libraries and add the following frameworks:
node_modules/io.ezto.verify.react/ios/release/eztoverify_sdk.framework
node_modules/io.ezto.verify.react/ios/iproov/iProov.xcframework

3 Permissions
This section lists the permissions that need to be declared in your info.plist file located in <PROJECT_DIR>\ios\Runner\info.plist. These permissions are required for the ezto verify SDK to function correctly, allowing it to access the necessary device features.
<key>NSFaceIDUsageDescription</key>
<string>FaceID is required for user authentication</string>
<key>NSMicrophoneUsageDescription</key>
<string>Mic access is required for user authentication</string>
<key>NSCameraUsageDescription</key>
<string>Camera access is required for user authentication</string>
<key>NSLocationAlwaysAndWhenInUseUsageDescription</key>
<string>Location access is required for user authentication</string>
<key>NSLocationWhenInUseUsageDescription</key>
<string>Location access is needed for user authentication.</string>
<key>NSAppTransportSecurity</key>
<dict>
    <key>NSAllowsArbitraryLoads</key>
    <true/>
</dict>
4 Setup
This section explains how to set up the ezto verify SDK for different verification methods available. Currently, we have iOS setup available for FIDO, UAE PASS Verification, and DeepLink.
FIDO / Passkeys
To setup FIDO or Passkeys, it is necessary to include the webcredentials along with your workspace URL to ios/Runner.entitlements:
<?xml version="1.0" encoding="UTF-8"?>
<!DOCTYPE plist PUBLIC "-//Apple//DTD PLIST 1.0//EN" "http://www.apple.com/DTDs/PropertyList-1.0.dtd">
<plist version="1.0">
<dict>
    <key>aps-environment</key>
    <string>development</string>
    <key>com.apple.developer.associated-domains</key>
    <array>
        <string>webcredentials:example.ezto.io</string>
        <!-- Replace example.ezto.io with your ezto verify workspace url -->
        <!-- Go to Dashboard > Settings > General, copy the URL. -->
    </array>
</dict>
</plist>
UAE PASS Verification
To enable UAE PASS Verification, it is required to add usage descriptions info.plist located in <PROJECT_DIR>\ios\Runner\info.plist:
<key>LSApplicationQueriesSchemes</key>
<array>
    <string>uaepass</string>
    <string>uaepassstg</string>
</array>
<key>CFBundleURLTypes</key>
<array>
    <dict>
        <key>CFBundleURLSchemes</key>
        // Add your bundle_id
        <array>
            <string>{{bundle_id}}</string>
        </array>
        <key>CFBundleURLName</key>
        <string>sdk_scheme</string>
    </dict>
</array>
DeepLink
To setup the DeepLink functionality, it is required to add the applinks with your workspace URL to ios/Runner.entitlements:
<?xml version="1.0" encoding="UTF-8"?>
<!DOCTYPE plist PUBLIC "-//Apple//DTD PLIST 1.0//EN" "http://www.apple.com/DTDs/PropertyList-1.0.dtd">
<plist version="1.0">
<dict>
    <key>aps-environment</key>
    <string>development</string>
    <key>com.apple.developer.associated-domains</key>
    <array>
        <string>applinks:example.ezto.io</string>
        <!-- Replace example.ezto.io with your ezto verify workspace url -->
        <!-- Go to Dashboard > Settings > General, copy the URL. -->
    </array>
</dict>
</plist>